Creative Cake Pop Flower Ideas
Highlighted under: Chocolate Recipes | Cocoa Treats
I absolutely love making cake pops, and flowers are one of my favorite themes! There's something invigorating about transforming simple cake into colorful blooms that delight both the eyes and the palate. Each cake pop can be a unique piece of art, making them perfect not just for parties but also for simple gatherings. Today, I’m excited to share some fun and creative flower ideas that will inspire your next baking adventure! Let’s dive in and bring a burst of color to your dessert table.
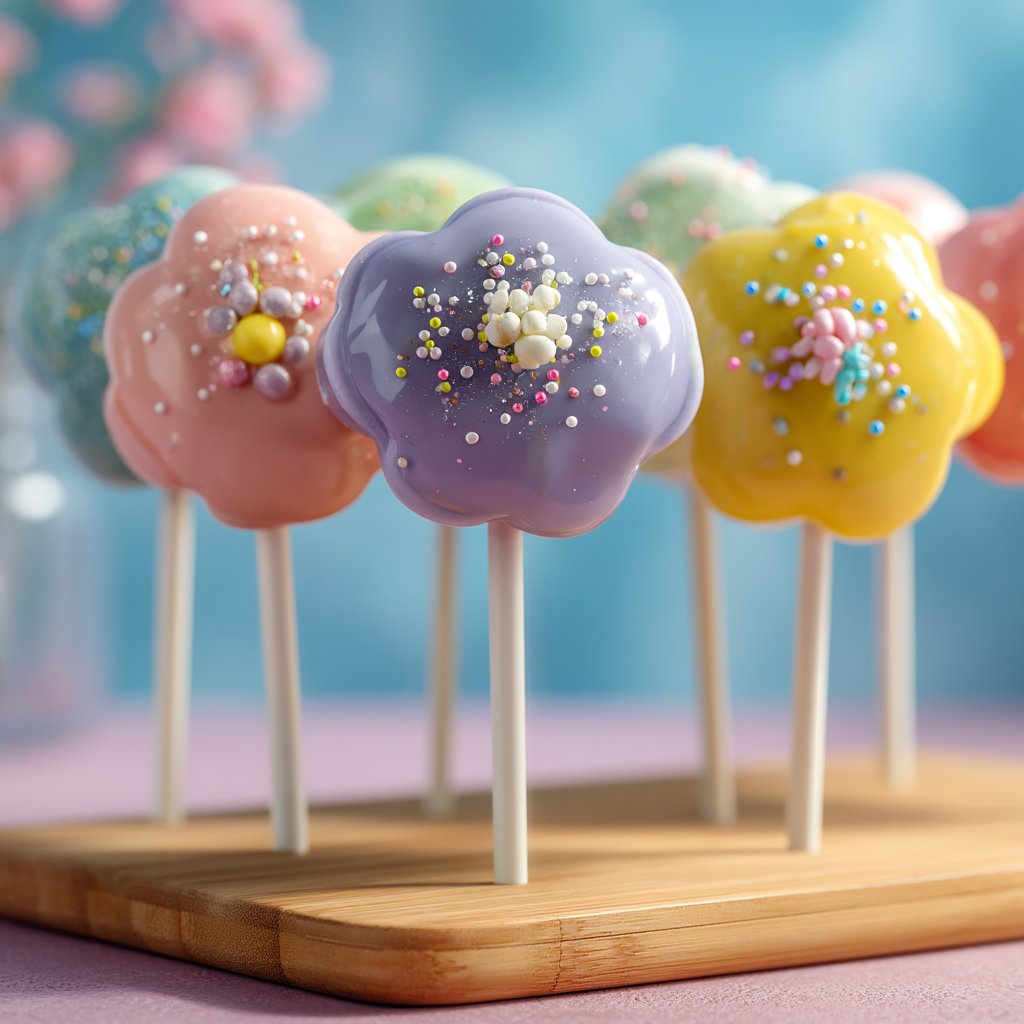
During my last baking spree, I decided to try my hand at creating flower-shaped cake pops. I used a vanilla cake base, which pairs wonderfully with various colors of chocolate coating. The key is to use candy melts, as they come in a myriad of colors and are easy to work with. By adding some edible glitter, I managed to create a magical garden effect!
While decorating, I found that using a variety of sprinkles added delightful texture. I also learned that letting the cake pops cool completely after dipping helps prevent the decorations from sliding off. It’s all about patience and creativity!
Why You Will Love This Recipe
- Bright and colorful designs that brighten any occasion
- Fun activity for kids or family gatherings
- Easily customizable to suit any flavor preference
Key Techniques for Flower-Shaped Cake Pops
The artistry behind flower-shaped cake pops lies in shaping and layering your cake mixture. Start by taking small amounts of the crumbled cake and frosting mixture, about 1 to 1.5 tablespoons each. For the petals, consider slicing off small sections from the round balls and pressing them into petal shapes, roughly a quarter-inch thick. This will create a more defined flower shape, making them visually appealing. Remember to keep the shapes uniform to ensure even coating and presentation.
When rolling the cake mixture, ensure you don’t over-warm the cake with your hands, as this can lead to a sticky consistency—making it difficult to shape. If your mixture becomes too gooey, refrigerate it for about 10-15 minutes to firm up before shaping. Also, lightly dust your hands with powdered sugar or cocoa to prevent sticking. This will help create smoother finishes on your flower petals and rounded cake pop bases.
Decorating Your Cake Pops
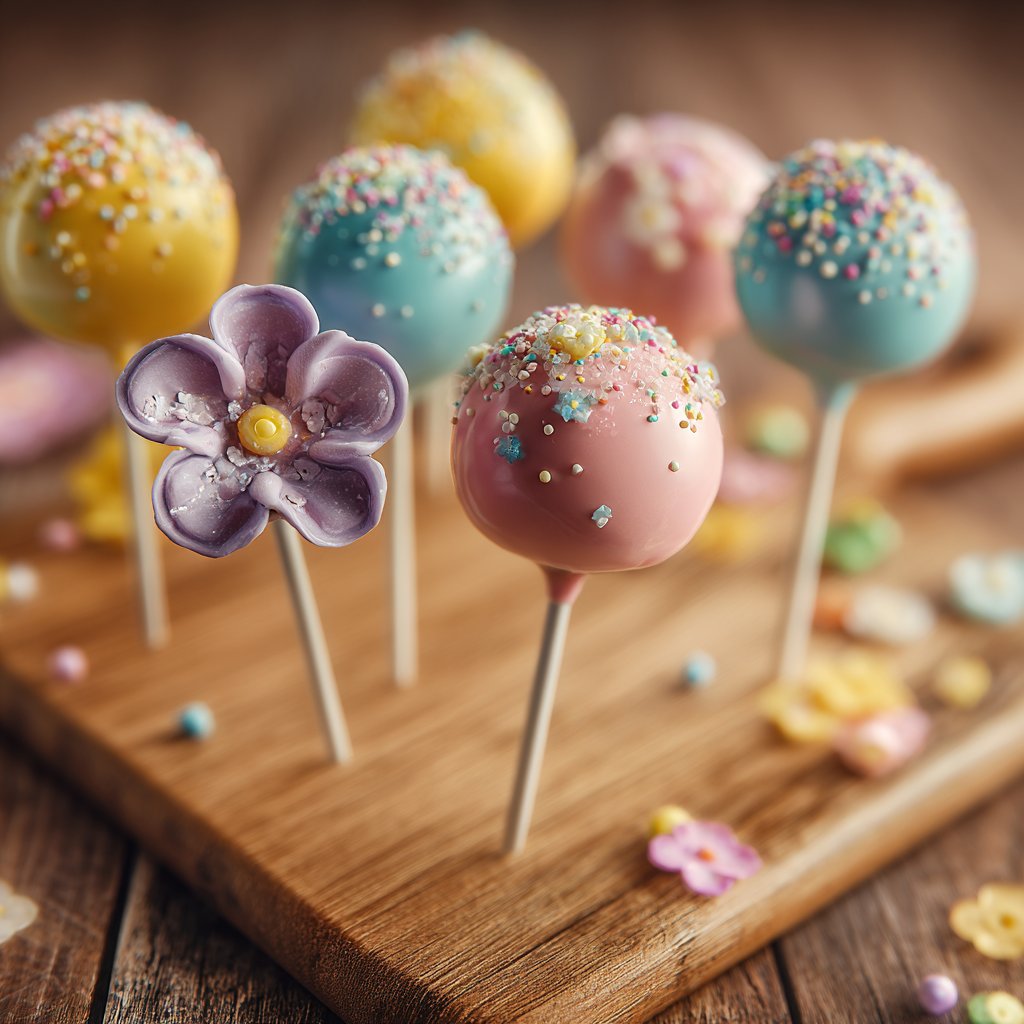
The decoration phase is where your creativity truly shines! After dipping the cake pops in melted candy melts, you can add texture by rolling them in sprinkles right after coating. The sprinkles will stick better if the candy melts are still wet, so work quickly. For a smoother finish, let the candy melts cool slightly before dipping—just until they are glossy, which usually takes about 30 seconds after melting.
If you're venturing to make leaves with green candy melts, consider using a piping bag. Just melt the candy melts, fill your piping bag, and pipe small leaf shapes on wax paper. Once set, gently peel them off and attach to the cake pops using a dab of melted candy. This adds a lovely touch that enhances the floral theme, making the cake pops look more realistic and inviting.
Ingredients
Gather the ingredients below to start your creative journey:
For the Cake Pops
- 1 pre-made cake (vanilla or chocolate)
- 1 cup of frosting (vanilla or chocolate)
- Candy melts in various colors
- Lollipop sticks
- Edible glitter
- Sprinkles (assorted shapes and colors)
- Green candy melts (for leaves)
Make sure to have all ingredients ready before you start crafting your cake pops!
Instructions
Follow these simple steps to create beautiful flower cake pops:
Make Cake Pop Mixture
Crumble the pre-made cake into a large bowl, then mix in the frosting until well combined. The mixture should be moist but firm enough to hold its shape.
Shape the Flowers
Take small portions of the cake mixture and roll them into ball shapes. For flower petals, flatten smaller pieces and shape them into petals before attaching them to the balls.
Insert the Sticks
Dip the end of each lollipop stick into melted candy melts, then insert it into the bottom of each cake pop. This will help hold the stick in place.
Coat the Cake Pops
Melt your chosen candy melts according to package instructions, then dip each cake pop into the melts. Tap off the excess, and let the pops set on a styrofoam block.
Decorate!
Once set, add sprinkles, edible glitter, or additional melted chocolate for decoration. Use green candy melts to create small leaves if desired.
Let your cake pops fully set before serving.
Pro Tips
- For smoother coating, ensure that your cake pops are chilled before dipping them into the melted candy melts. Also, try to work quickly with the decorations before the coating hardens.
Make-Ahead Tips
You can prepare the cake pop mixture a day in advance. After shaping the balls and petals, place them on a baking sheet lined with parchment paper and refrigerate. Once firm, transfer them to an airtight container, layering with parchment to prevent sticking, and they can be stored for up to three days. Just make sure to let them sit out for about 10 minutes before dipping to ensure the coating adheres properly.
If making the cake pops a day early, prepare the melted chocolate and leaves right before serving. This provides a fresh look and ensures that the chocolate coating doesn’t have a chance to dull overnight. A rapid reheating process using the microwave on half power for 15-second bursts can quickly revive candy melts that have cooled and thickened.
Flavor Variations
Feel free to experiment with the flavors of your cake pops by using different cake bases such as red velvet, lemon, or even matcha. Additionally, tailor your frosting to complement the chosen cake flavor, providing a more cohesive and enticing taste. For instance, a lemon or cream cheese frosting works beautifully with the red velvet cake, merging traditional flavors with creative presentation.
When it comes to candy melts, there are many options available like dark, milk, or even flavored types—like mint or strawberry—that can add a unique twist. Mixing colors can also lead to beautiful ombre effects when you dip. Simply create a gradient by pouring melted candy melts in different bowls and layering them on a skewer before dipping.
Questions About Recipes
→ Can I use any cake flavor for the cake pops?
Absolutely! Chocolate, vanilla, red velvet, or even funfetti are great options.
→ How can I store my cake pops?
Keep them in an airtight container at room temperature for up to a week.
→ Can I freeze cake pops?
Yes! You can freeze them before the coating, just make sure to wrap them individually.
→ What if I don’t have candy melts?
You can substitute with tempered chocolate or colored chocolate chips.
Creative Cake Pop Flower Ideas
Created by: The Dishroots Team
Recipe Type: Chocolate Recipes | Cocoa Treats
Skill Level: Easy
Final Quantity: 12
What You'll Need
For the Cake Pops
- 1 pre-made cake (vanilla or chocolate)
- 1 cup of frosting (vanilla or chocolate)
- Candy melts in various colors
- Lollipop sticks
- Edible glitter
- Sprinkles (assorted shapes and colors)
- Green candy melts (for leaves)
How-To Steps
Crumble the pre-made cake into a large bowl, then mix in the frosting until well combined. The mixture should be moist but firm enough to hold its shape.
Take small portions of the cake mixture and roll them into ball shapes. For flower petals, flatten smaller pieces and shape them into petals before attaching them to the balls.
Dip the end of each lollipop stick into melted candy melts, then insert it into the bottom of each cake pop. This will help hold the stick in place.
Melt your chosen candy melts according to package instructions, then dip each cake pop into the melts. Tap off the excess, and let the pops set on a styrofoam block.
Once set, add sprinkles, edible glitter, or additional melted chocolate for decoration. Use green candy melts to create small leaves if desired.
Extra Tips
- For smoother coating, ensure that your cake pops are chilled before dipping them into the melted candy melts. Also, try to work quickly with the decorations before the coating hardens.
Nutritional Breakdown (Per Serving)
- Calories: 210 kcal
- Total Fat: 8g
- Saturated Fat: 4g
- Cholesterol: 25mg
- Sodium: 50mg
- Total Carbohydrates: 32g
- Dietary Fiber: 1g
- Sugars: 20g
- Protein: 2g